Ever wondered how to control your Raspberry Pi from your Windows 10 computer without breaking the bank? Well, you're in luck! The world of remote computing is more accessible than ever, and controlling your Raspberry Pi behind a router on Windows 10 for free is not only possible but surprisingly straightforward. Whether you're a tech enthusiast, hobbyist, or just curious about the possibilities, this guide will walk you through everything you need to know. From setting up your Raspberry Pi to configuring your router and Windows 10, we’ve got you covered with step-by-step instructions and helpful tips.
In this digital age, the Raspberry Pi has become a cornerstone for DIY projects, home automation, and even professional applications. However, one common challenge users face is accessing their Raspberry Pi remotely when it's behind a router. The good news is that with the right tools and configurations, you can achieve seamless control without spending a dime. This article will explore the ins and outs of controlling your Raspberry Pi, ensuring you’re equipped with the knowledge to tackle any hurdles along the way.
Whether you're setting up a smart home, managing a server, or simply experimenting with coding, the ability to control your Raspberry Pi remotely is a game-changer. By the end of this guide, you'll understand the basics of networking, router configurations, and the software required to make this process a breeze. Let's dive into the world of remote computing and discover how you can take full control of your Raspberry Pi behind a router using Windows 10—all for free!
Read also:Who Is Lawrence Odonnells Partner Now Exploring The Life And Relationships Of The Renowned Tv Host
What is Raspberry Pi and Why Should You Control It Remotely?
The Raspberry Pi is a compact, affordable, and versatile single-board computer that has revolutionized the tech world. Initially designed for educational purposes, it has grown into a powerful tool for a wide range of applications, from media centers to IoT projects. But why would you want to control it remotely? Remote access allows you to manage your Raspberry Pi without being physically present, which is especially useful for projects that require constant monitoring or updates.
Controlling your Raspberry Pi remotely also enhances productivity. Imagine being able to adjust settings, run scripts, or monitor data from the comfort of your Windows 10 computer. This capability opens doors to countless possibilities, such as automating tasks, managing servers, or even controlling smart home devices. By learning how to control Raspberry Pi behind router Windows 10 free, you're equipping yourself with a valuable skill that can simplify your life and expand your tech capabilities.
Additionally, remote access promotes convenience and flexibility. Whether you're at work, traveling, or simply in another room, you can access your Raspberry Pi as if you were right next to it. This level of accessibility is not only convenient but also cost-effective, as you won't need additional hardware or expensive software. Let’s delve deeper into the specifics of setting up remote access for your Raspberry Pi.
What Are the Benefits of Controlling Raspberry Pi Behind Router?
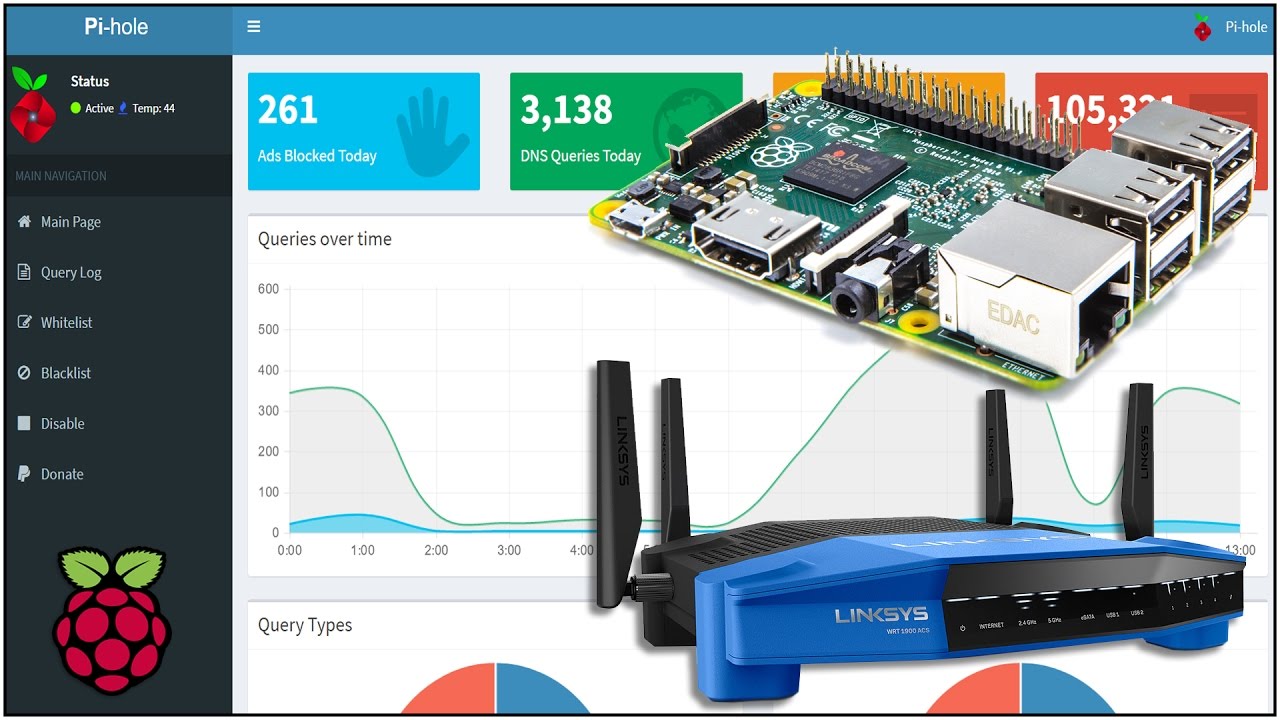
Controlling your Raspberry Pi behind a router offers several advantages. First and foremost, it enhances security by keeping your device on a local network, reducing the risk of unauthorized access. Additionally, it allows you to maintain a stable connection, ensuring uninterrupted communication between your Windows 10 computer and the Raspberry Pi. This setup is particularly beneficial for projects that require consistent performance, such as media streaming or data logging.
Another advantage is the ability to use your existing internet connection without the need for additional hardware. By configuring your router correctly, you can create a seamless bridge between your Raspberry Pi and Windows 10, enabling smooth remote control. Furthermore, this setup is highly customizable, allowing you to tailor the configuration to suit your specific needs and preferences.
Finally, controlling your Raspberry Pi behind a router promotes resource efficiency. Instead of dedicating a separate device for remote access, you can use your Windows 10 computer, which is likely already equipped with the necessary tools and software. This approach not only saves money but also reduces clutter, making your workspace more organized and efficient.
Read also:Discover The Ultimate Guide To Allmovieshub 300mb Movies For Entertainment Enthusiasts
How Does Remote Access Work for Raspberry Pi?
Remote access for Raspberry Pi relies on a combination of networking protocols and software tools. At its core, it involves establishing a connection between your Windows 10 computer and the Raspberry Pi through your router. This connection is facilitated by protocols such as SSH (Secure Shell) and VNC (Virtual Network Computing), which enable secure communication and graphical interaction.
SSH is primarily used for command-line access, allowing you to execute scripts and manage files directly from your Windows 10 computer. On the other hand, VNC provides a graphical interface, enabling you to interact with your Raspberry Pi as if you were using a physical monitor, keyboard, and mouse. Both methods are essential for controlling Raspberry Pi behind router Windows 10 free, offering flexibility and functionality to suit various use cases.
Understanding how these protocols work is crucial for setting up remote access successfully. By configuring your router to forward the necessary ports and installing the appropriate software on your Windows 10 computer, you can create a robust and reliable connection. This setup ensures that your Raspberry Pi remains accessible and controllable from anywhere within your network.
Can You Control Raspberry Pi Behind Router Without Additional Costs?
Yes, you can control your Raspberry Pi behind a router without incurring additional costs. Leveraging free and open-source tools, you can achieve full remote access without spending a penny. The key lies in utilizing software such as PuTTY for SSH connections and TightVNC for graphical access, both of which are available for free. These tools provide the necessary functionality to control Raspberry Pi behind router Windows 10 free, ensuring a cost-effective solution for your remote computing needs.
Moreover, most modern routers come equipped with the features required for remote access, such as port forwarding and static IP assignments. By configuring these settings appropriately, you can establish a secure and stable connection between your Raspberry Pi and Windows 10 computer. This setup eliminates the need for additional hardware or paid software, making it an ideal choice for budget-conscious users.
It's also worth noting that many of the tools and resources available for controlling Raspberry Pi are community-driven, meaning they are continuously updated and improved by a dedicated group of developers and enthusiasts. This collaborative effort ensures that the software remains relevant and functional, providing you with a reliable and up-to-date solution for remote access.
What Tools Do You Need to Control Raspberry Pi for Free?
To control your Raspberry Pi behind a router on Windows 10 for free, you'll need a few essential tools. Firstly, you'll require an SSH client like PuTTY, which allows you to establish a secure connection to your Raspberry Pi via the command line. PuTTY is a lightweight and easy-to-use application that is perfect for executing scripts and managing files remotely.
For graphical access, consider using TightVNC or RealVNC, both of which are free and offer robust functionality. These VNC clients enable you to interact with your Raspberry Pi's desktop environment as if you were using a physical monitor. They provide a seamless user experience, allowing you to control your Raspberry Pi with ease and precision.
Lastly, ensure that your router supports port forwarding and static IP assignments. Most modern routers have these features built-in, but it's always a good idea to check your router's documentation or consult its user manual. By configuring these settings correctly, you can create a secure and reliable connection between your Raspberry Pi and Windows 10 computer, ensuring smooth remote access.
Which Software Is Best for Remote Access on Windows 10?
When it comes to remote access on Windows 10, several software options stand out for their functionality and ease of use. For command-line access, PuTTY remains one of the top choices due to its simplicity and reliability. It supports SSH and Telnet protocols, making it an excellent tool for executing scripts and managing files on your Raspberry Pi.
For graphical access, TightVNC and RealVNC are highly recommended. TightVNC offers a lightweight and customizable solution, while RealVNC provides a more polished and feature-rich experience. Both options are free and compatible with Windows 10, ensuring that you can control your Raspberry Pi seamlessly from your computer.
Ultimately, the best software for you will depend on your specific needs and preferences. If you prioritize speed and simplicity, PuTTY and TightVNC may be the way to go. However, if you require advanced features and a user-friendly interface, RealVNC might be the better choice. Experiment with different options to find the one that suits you best.
How to Set Up Your Raspberry Pi for Remote Access?
Setting up your Raspberry Pi for remote access involves several key steps. First, ensure that your Raspberry Pi is properly configured and connected to your local network. This includes assigning it a static IP address to prevent conflicts and ensure consistent connectivity. Next, enable SSH and VNC on your Raspberry Pi, which can be done through the Raspberry Pi Configuration tool or by editing the configuration files directly.
Once SSH and VNC are enabled, install the necessary software on your Windows 10 computer. This includes an SSH client like PuTTY and a VNC client such as TightVNC or RealVNC. Configure these tools to connect to your Raspberry Pi's IP address and port numbers, ensuring that the settings match those on your Raspberry Pi.
Finally, configure your router to forward the required ports for SSH and VNC. This step is crucial for establishing a secure and stable connection between your Raspberry Pi and Windows 10 computer. By following these steps, you can create a robust setup that allows you to control Raspberry Pi behind router Windows 10 free with ease.
What Are the Steps to Configure Your Router for Remote Access?
Configuring your router for remote access involves several critical steps. Start by logging into your router's admin interface, typically accessible via a web browser. Once logged in, navigate to the port forwarding section and add rules for SSH (port 22) and VNC (port 5900). These rules should direct incoming traffic to your Raspberry Pi's static IP address, ensuring that connections are routed correctly.
Next, enable remote management if your router supports it. This feature allows you to access your router's admin interface from outside your local network, providing additional control and flexibility. However, be sure to secure your router with a strong password and enable encryption to protect against unauthorized access.
Finally, consider setting up a dynamic DNS (DDNS) service if your internet provider assigns dynamic IP addresses. DDNS ensures that your router's public IP address is always up-to-date, allowing you to connect to your Raspberry Pi from anywhere in the world. By following these steps, you can create a secure and reliable setup for controlling Raspberry Pi behind router Windows 10 free.
What Are Some Common Issues and How to Troubleshoot Them?
When setting up remote access for your Raspberry Pi, you may encounter a few common issues. One frequent problem is connection timeouts, which can occur due to incorrect port forwarding settings or firewall restrictions. To troubleshoot this issue, double-check your router's port forwarding rules and ensure that your firewall is not blocking the necessary ports.
Another common issue is authentication failures, which may arise from incorrect usernames or passwords. Verify that your SSH and VNC credentials are accurate and that the authentication settings on your Raspberry Pi match those on your Windows 10 computer. If the problem persists, try resetting the credentials or reinstalling the relevant software.
Lastly, network connectivity problems can arise if your Raspberry Pi loses its IP address or if your router's configuration changes unexpectedly. To mitigate these issues, ensure that your Raspberry Pi has a static IP address and that your router's settings are stable and consistent. By addressing these common issues promptly, you can maintain a smooth and reliable connection for controlling Raspberry Pi behind router Windows 10 free.
Can You Use Third-Party Tools for Controlling Raspberry Pi?
Yes, third-party tools can be used to control your Raspberry Pi, offering additional functionality and flexibility. Tools like TeamViewer and AnyDesk provide user-friendly interfaces and advanced features, such as file transfer and screen sharing. These applications can simplify the process of controlling Raspberry Pi behind router Windows 10 free, making it accessible even to beginners.
However, it's important to weigh the pros and cons of using third-party tools. While they offer convenience and ease of use, they may introduce security risks or require additional resources. Always ensure that the tools you choose are reputable and secure, and consider the implications of sharing control of your Raspberry Pi with external services.
Incorporating third-party tools into your setup can enhance your remote access capabilities, but it's crucial to maintain a balance between functionality and security. By carefully selecting and configuring these tools, you can achieve a seamless and secure connection for controlling Raspberry Pi behind router Windows 10 free.
What Are the Best Practices for Securing Your Raspberry Pi?
Securing your Raspberry Pi is essential for protecting your data and maintaining the integrity of your projects. Start by updating your operating system and software regularly to ensure that you have the latest security patches. Next, change the default SSH and VNC passwords to strong, unique credentials, reducing the risk of unauthorized access.
Consider enabling two-factor authentication (2FA) for an added layer of security. This feature requires users to provide two forms of identification before accessing your Raspberry Pi, making it significantly more difficult for attackers to gain unauthorized access. Additionally, configure your firewall to restrict access to specific IP addresses or networks, further enhancing your security posture.
Finally, regularly back up your Raspberry Pi's data and configurations to prevent data loss in case of a security breach or hardware failure. By following these best practices, you can ensure that your Raspberry Pi remains secure and reliable, allowing you to control Raspberry Pi behind router